Table of Contents
- What the Plugin Does
- Requirements
- Installation
- First-Time Setup
- Admin Settings Page
- Placing the Search on a Page
- When to Rebuild the Index
- Troubleshooting
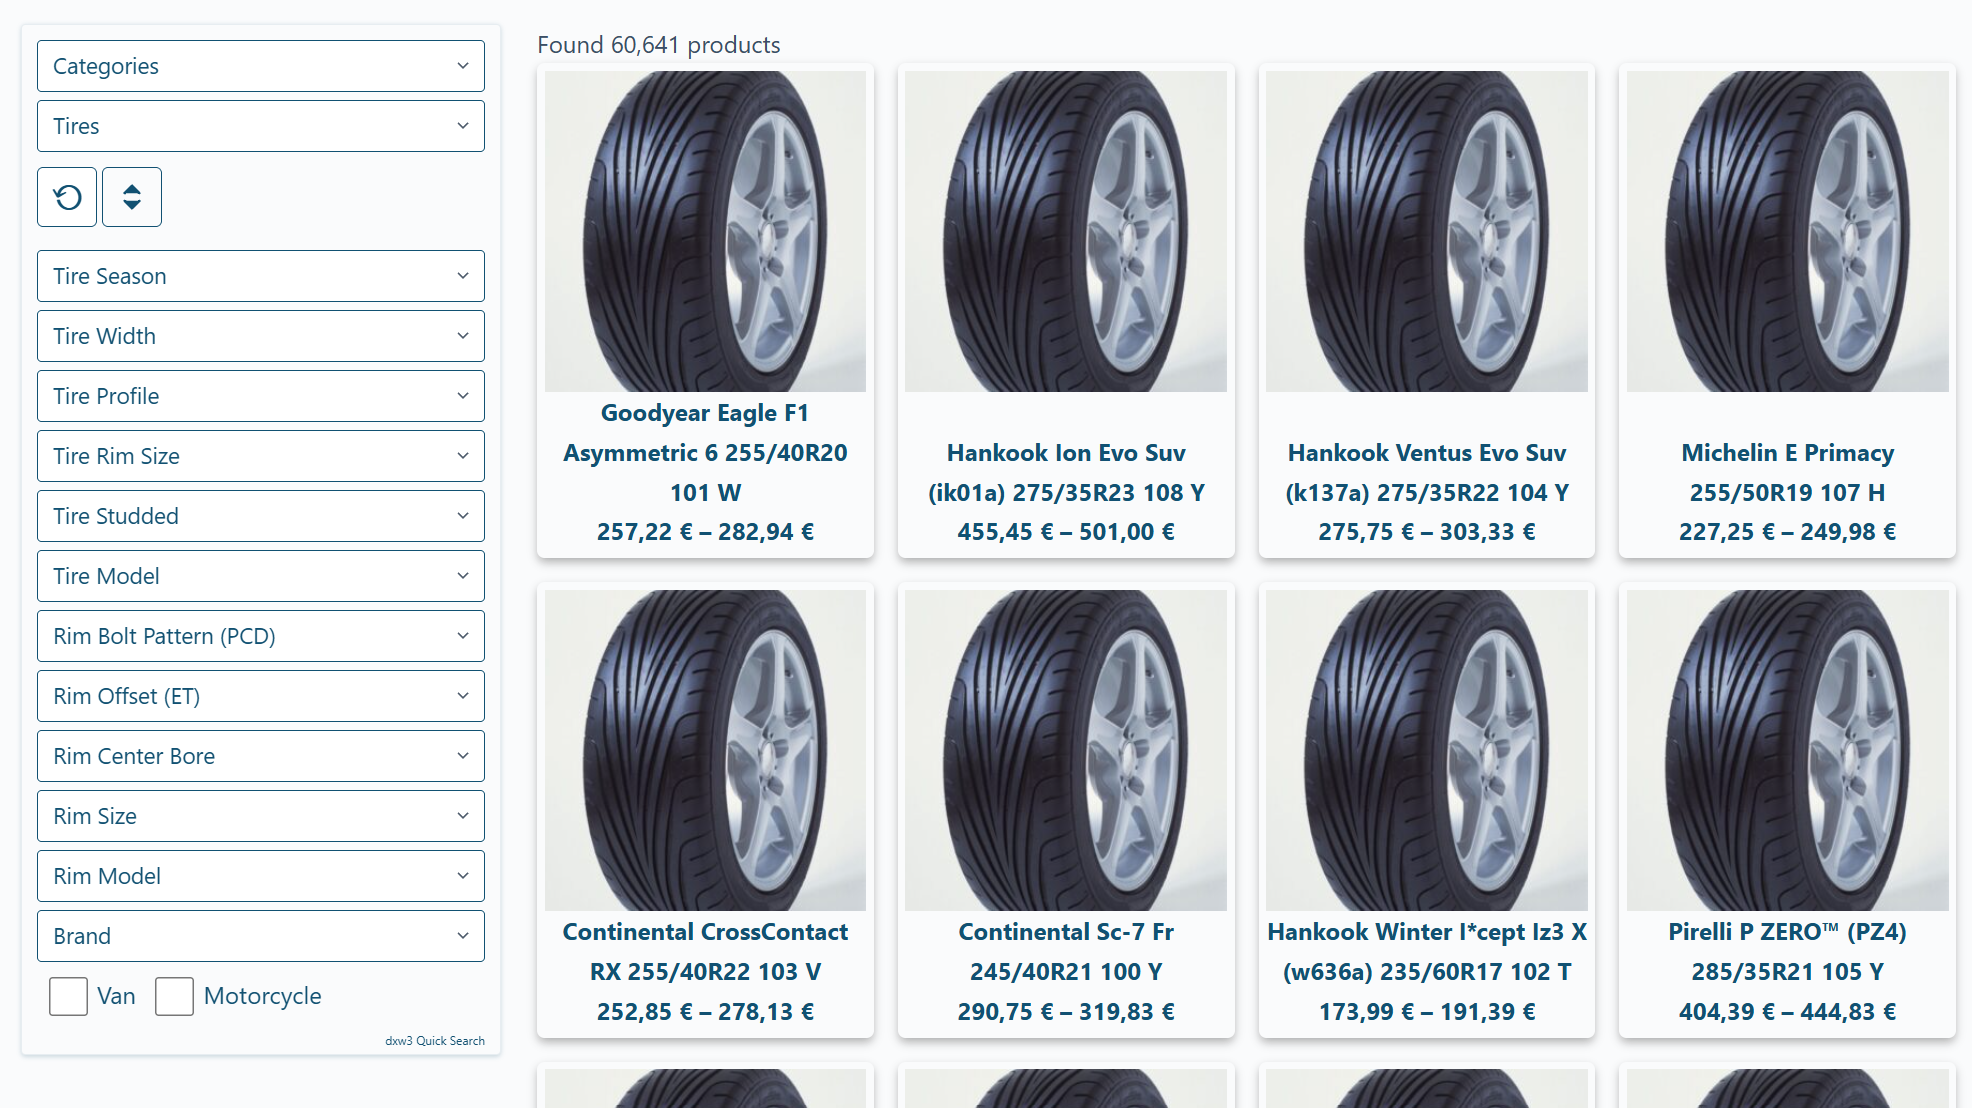
1. What the Plugin Does
dxw3 Quick Search Pro is a high-performance product filtering engine for WooCommerce. Instead of running live WordPress/WooCommerce queries on every filter change, the plugin maintains a dedicated search index in optimised database tables. Filter interactions query that index directly, making results near-instant even with 50,000+ products.
Key features:
- Progressive filtering — results narrow down in real time as users refine each filter
- Categories, attributes, and tags as filter dimensions
- Two filter layouts — horizontal (top) bar or desktop sidebar
- Two request modes — standard WordPress AJAX or a lightweight standalone endpoint (“Lightning mode”)
- Drag-and-drop filter ordering in the admin
- Scheduled index rebuild — keep the index fresh automatically overnight
- Mini search box shortcode for embedding a compact filter widget anywhere
2. Requirements
| Requirement | Minimum |
|---|---|
| WordPress | 6.0+ |
| WooCommerce | 7.0+ |
| PHP | 7.4+ |
| MySQL / MariaDB | 5.7+ / 10.3+ |
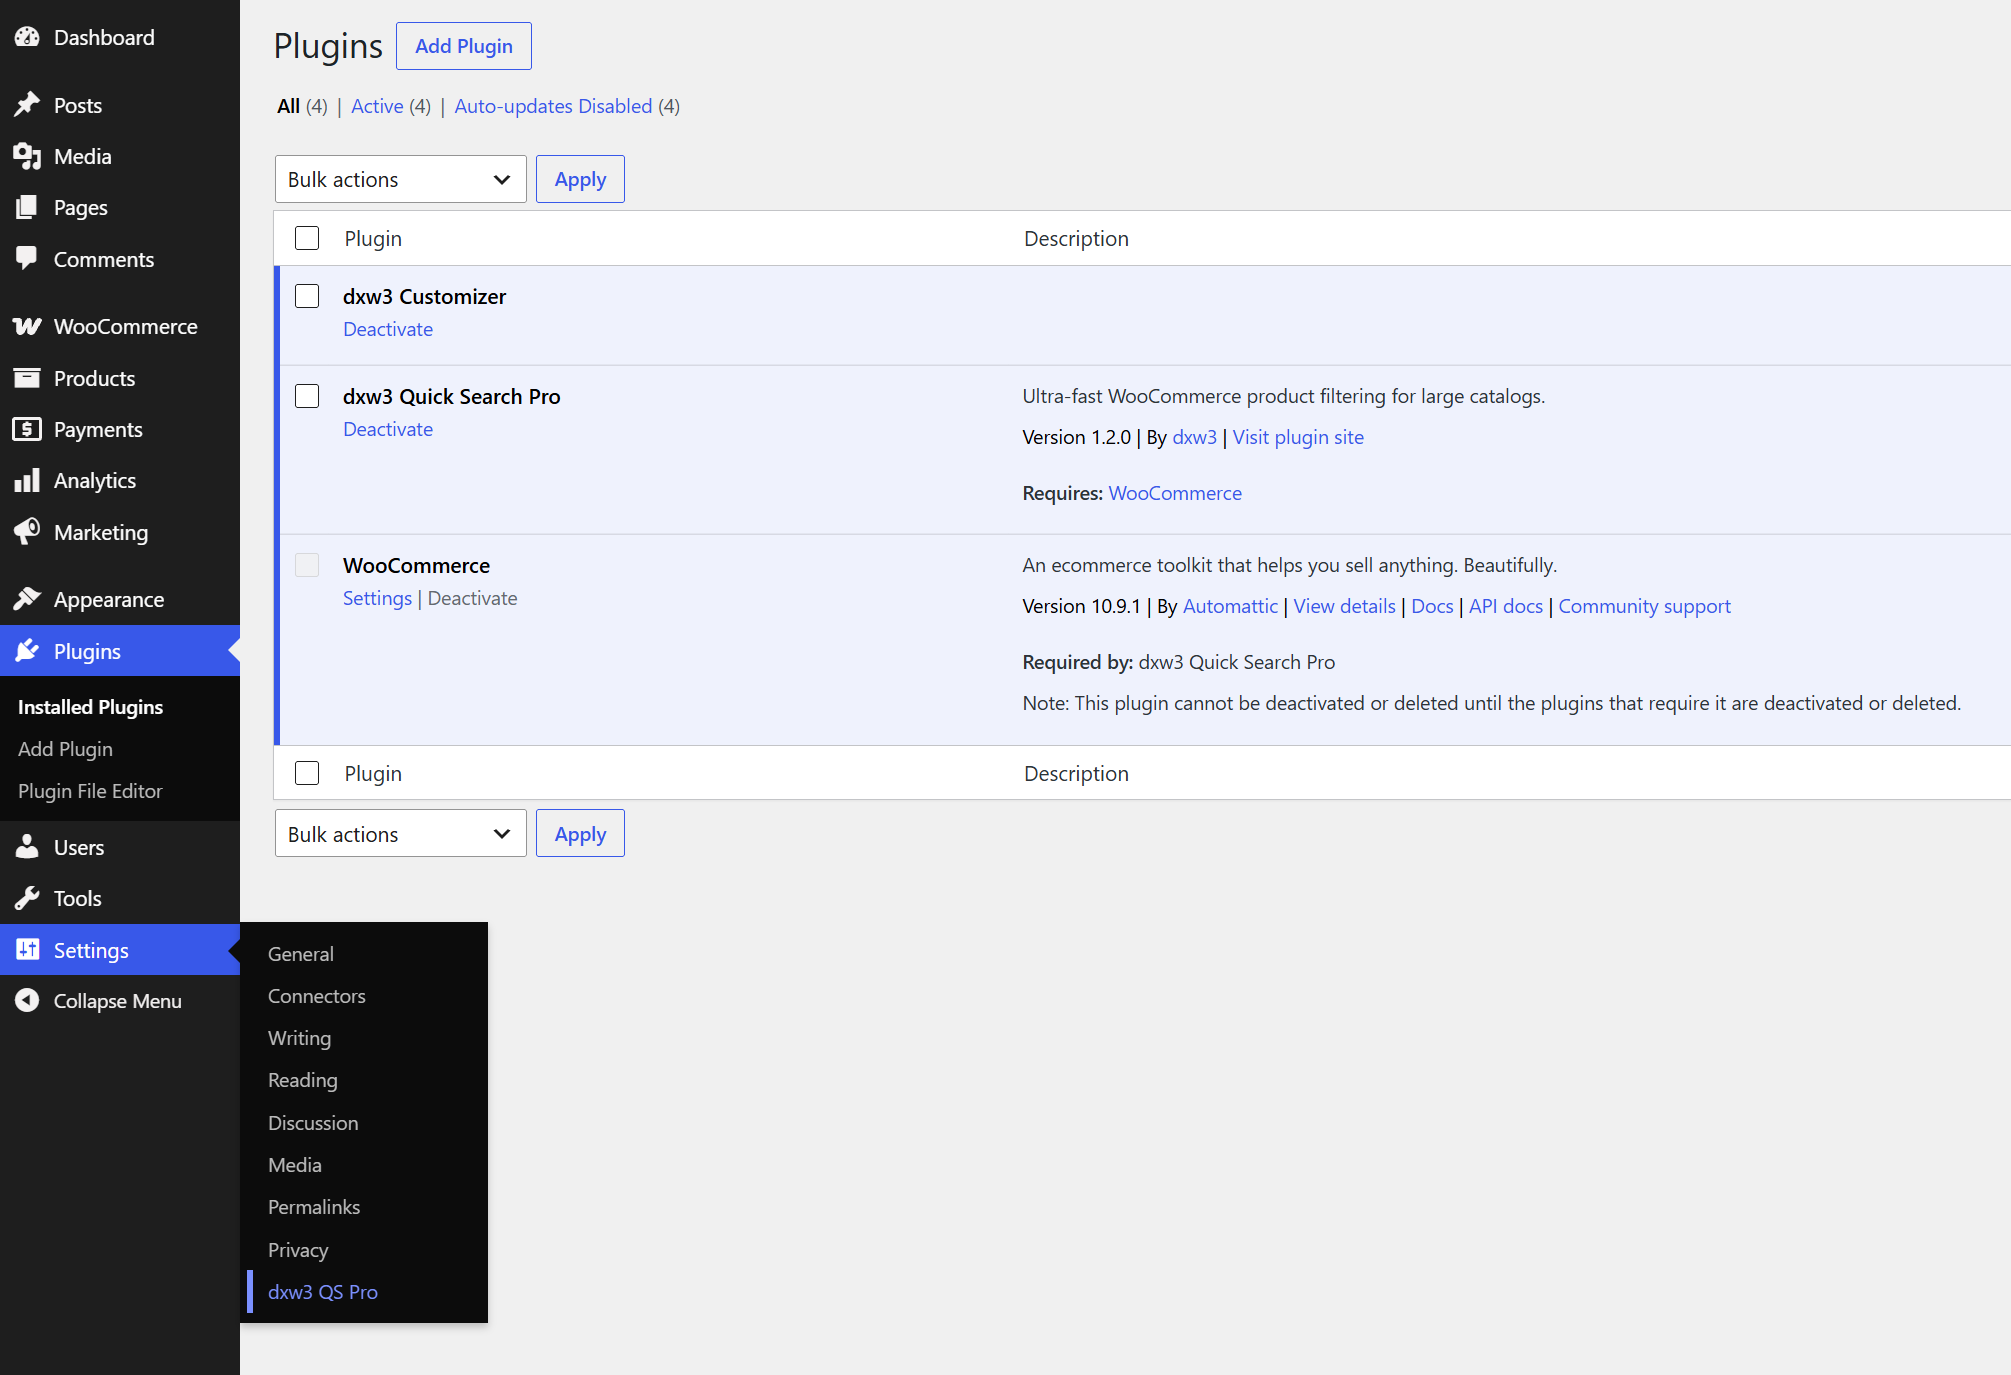
WooCommerce must be installed and active before activating this plugin. If the free dxw3-quick-search plugin is also installed, it will be automatically deactivated to avoid conflicts.
3. Installation
- Upload the plugin ZIP through Plugins → Add New → Upload Plugin, or copy the
dxw3-quick-search-profolder towp-content/plugins/. - Click Activate Plugin.
- Navigate to Settings → dxw3 QS Pro to start configuring.
4. First-Time Setup
Follow these four steps after activating the plugin:
| Step | Action |
|---|---|
| 1 | Build the index — Click Reset and Rebuild Search Index and wait for it to finish |
| 2 | Configure filters — Enable the categories, attributes, and tags you want to expose |
| 3 | Save settings — Click the Save settings button |
| 4 | Add the shortcode — Create or edit a page and add [dxw3-quick-search] |
Rebuild the index again whenever you make structural changes to your WooCommerce taxonomy (new categories, renamed attributes, etc.).
5. Admin Settings Page
Navigate to Settings → dxw3 QS Pro in the WordPress dashboard to reach the settings page.
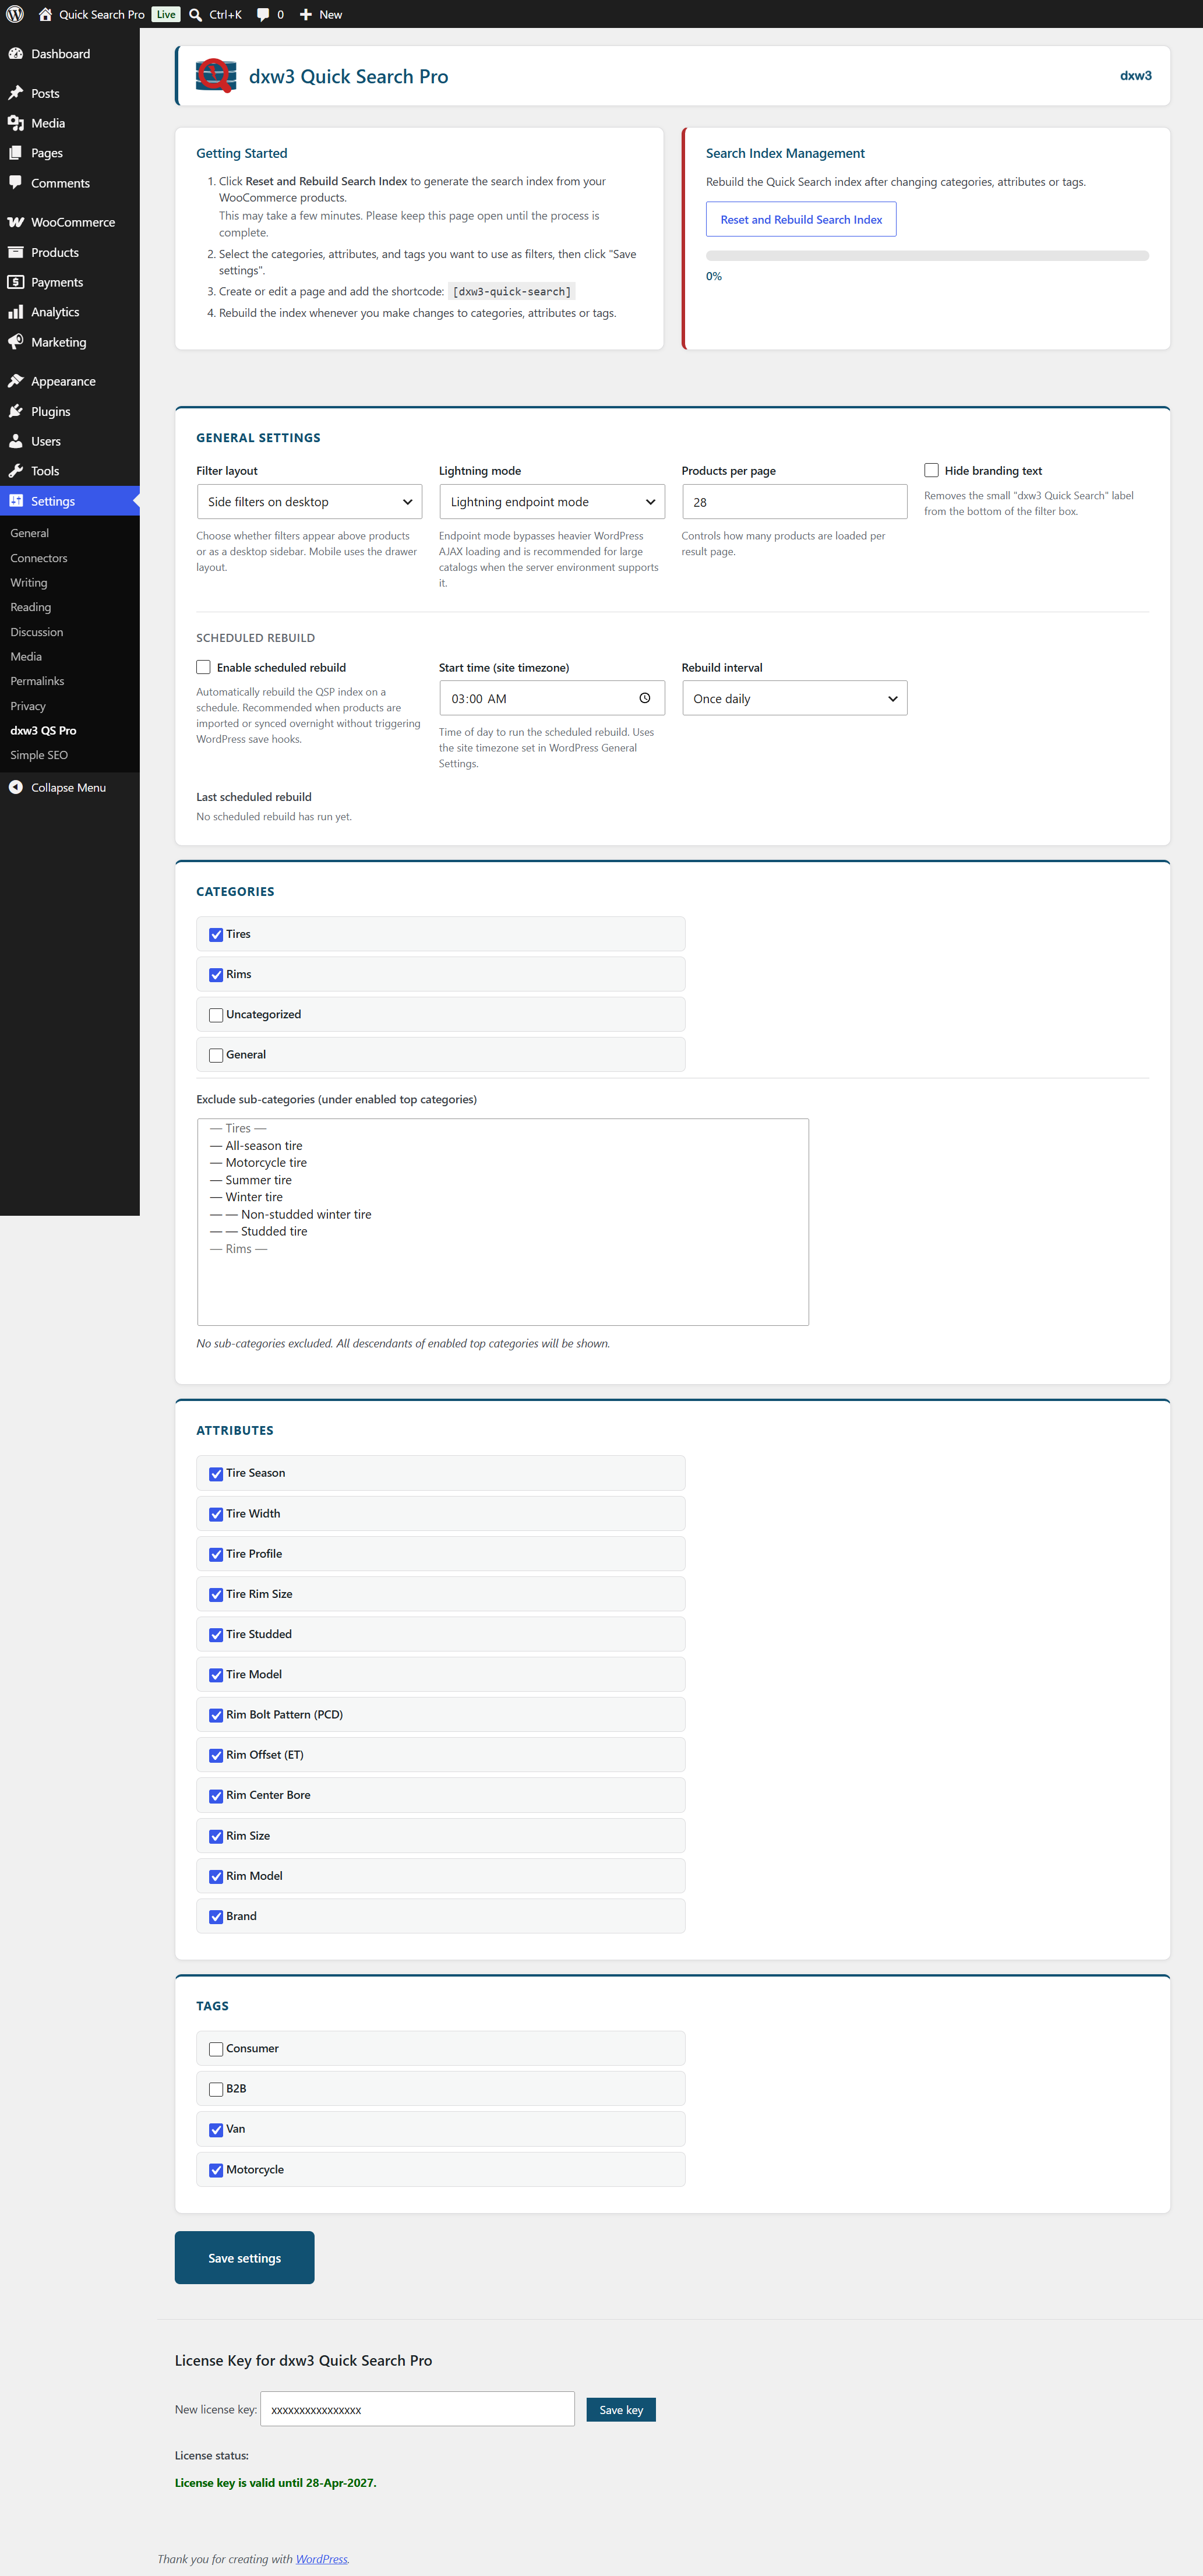
5.1 Getting Started panel & Index Management
The top of the settings page contains two side-by-side panels.
Getting Started lists the four setup steps described in section 4 above.
Search Index Management contains the rebuild button:
| Control | Description |
|---|---|
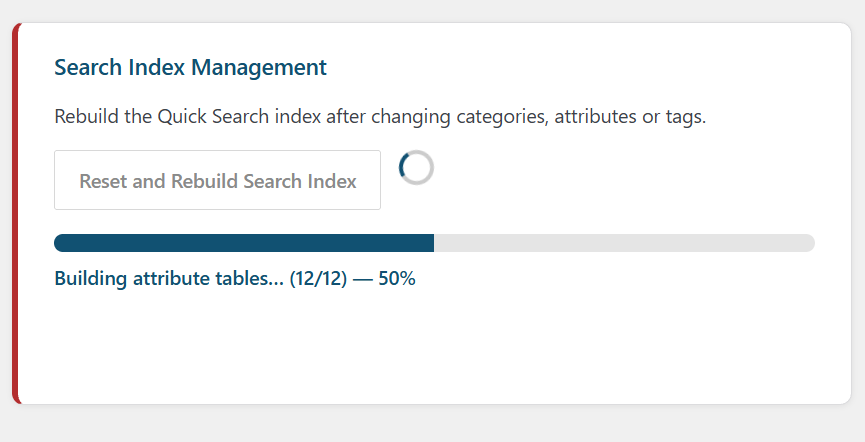
| Reset and Rebuild Search Index | Drops all existing index data, re-creates the index tables from your current WooCommerce taxonomy, and repopulates them from your product catalogue. A progress bar and log appear while the rebuild runs. Keep the page open until it completes. |
⚠️ The rebuild should not be run during peak trading hours.
5.2 General Settings
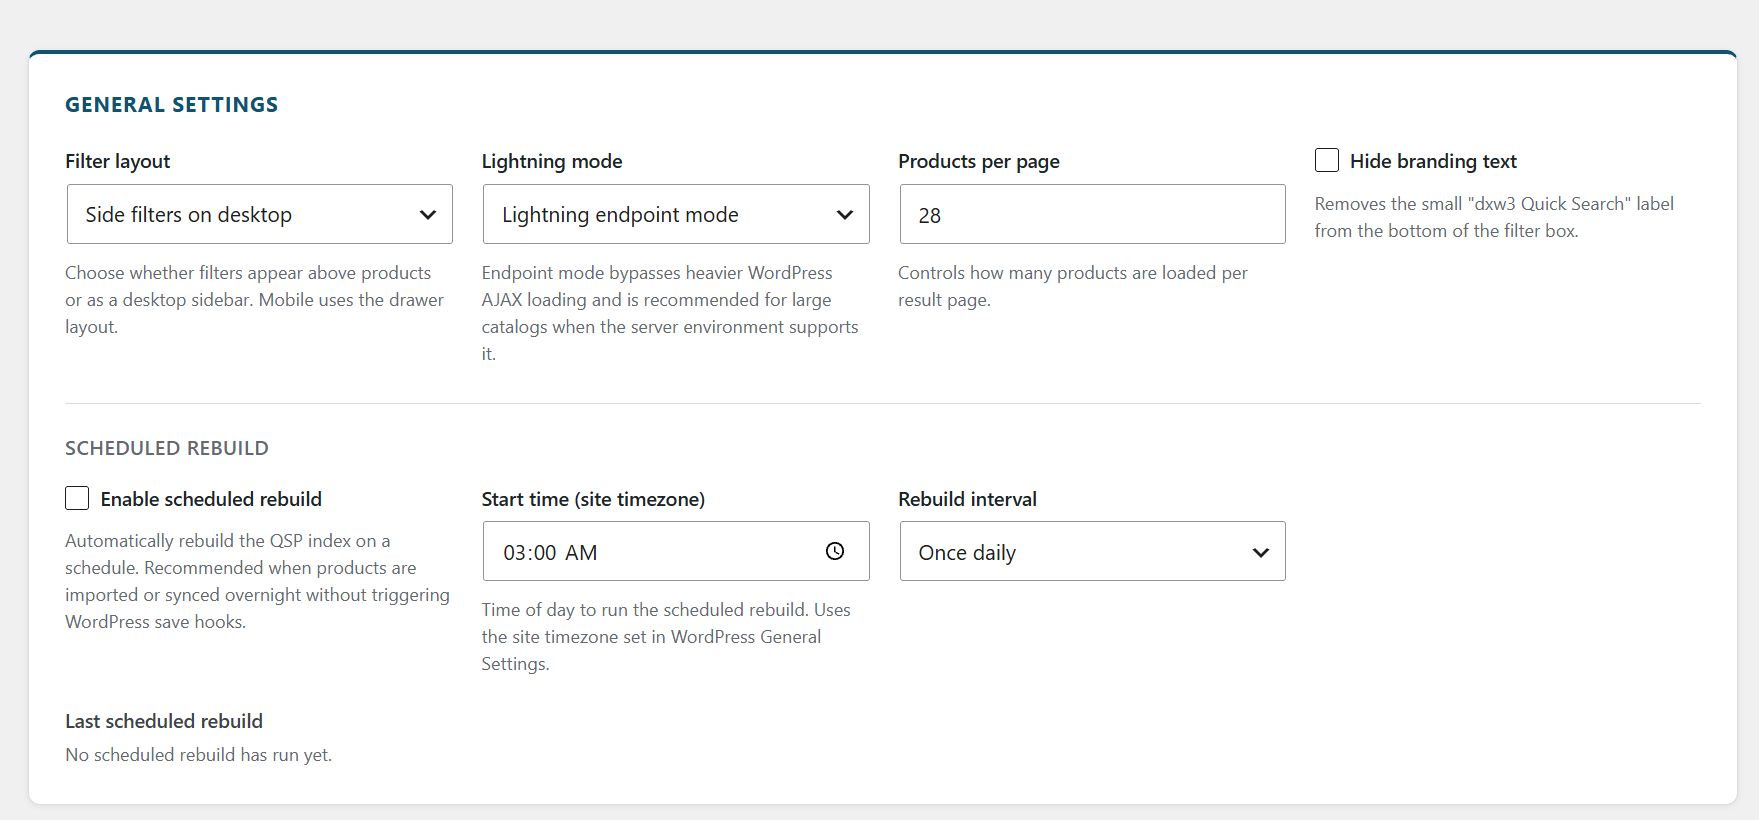
Filter layout
| Option | Behaviour |
|---|---|
| Top filters | All filter dropdowns appear in a horizontal row above the product grid |
| Side filters on desktop | Filter dropdowns appear in a left-hand sidebar on desktop screens. On mobile, a drawer/overlay is used regardless of this setting |
Choose Top filters for simpler layouts or when horizontal space is limited. Choose Side filters on desktop for richer filter bars with many active filters.
Lightning mode
| Option | Behaviour |
|---|---|
| WordPress AJAX mode | Filter requests go through the standard wp-admin/admin-ajax.php handler. Fully compatible with all server environments. |
| Lightning endpoint mode | Filter requests bypass WordPress entirely and hit a standalone PHP endpoint (endpoint/dxw3-qs-endpoint.php). Significantly faster on large catalogues. Recommended when your server environment supports direct PHP execution outside WordPress. |
Start with WordPress AJAX mode if you are unsure. Switch to Lightning endpoint mode once the site is confirmed to be working and you want to maximise performance.
Products per page
Accepts a whole number between 1 and 200.
Controls how many product cards are rendered per page in the search results. Pagination is added automatically when the result count exceeds this number. Default is 24.
Increasing this value improves usability if users expect to scroll through large result sets, but reduces initial load performance. Values above 60 are rarely needed.
Hide branding text (license required)
When checked, removes the small “dxw3 Quick Search” label that appears at the bottom of the filter widget. This option is only shown when a valid license key is active.
5.3 Scheduled Rebuild
This section lets you run an automatic index rebuild on a cron schedule, replacing the need to click the manual rebuild button after overnight product imports or price syncs.
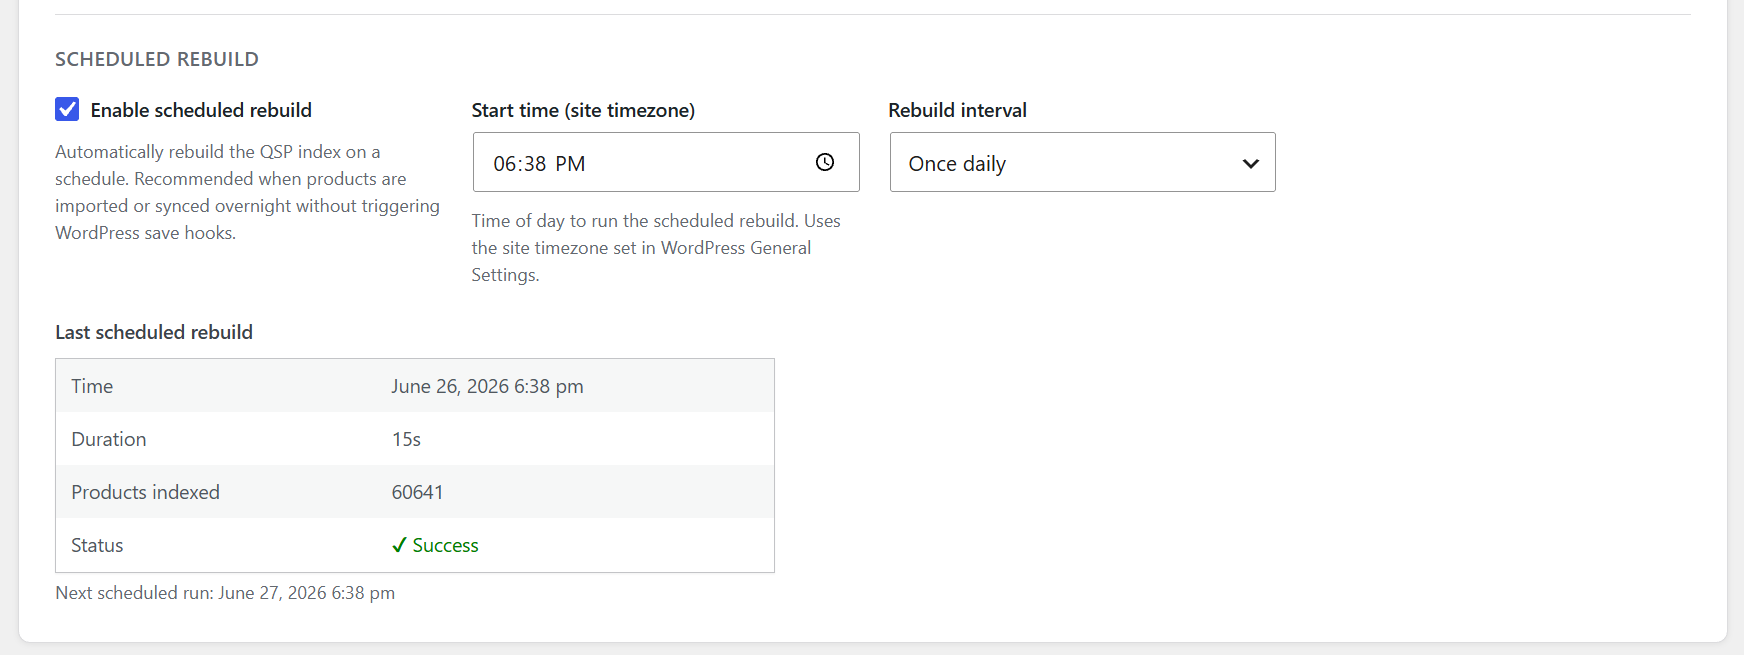
Enable scheduled rebuild
Check this box to activate the schedule. Uncheck it to disable without losing the saved interval and time settings.
When to use this: Enable scheduled rebuild whenever products are imported, synced, or updated via a feed or script that does not trigger standard WordPress save hooks (e.g. direct database inserts, WP-CLI imports, ERP integrations).
Start time (site timezone)
A time-of-day picker in HH:MM format. The rebuild will be triggered at this time, using the timezone configured in Settings → General → Timezone.
Default is 03:00. Choose a time when site traffic is lowest.
Rebuild interval
| Option | Behaviour |
|---|---|
| Every hour | Runs once per hour, starting from the configured start time |
| Twice daily | Runs twice per day at approximately 12-hour intervals |
| Once daily | Runs once per day at the configured start time |
Most stores will use Once daily. Use Twice daily or Every hour only if products change frequently throughout the day.
Last scheduled rebuild status
After the first scheduled run, a status table appears showing:
- Time — when the rebuild ran
- Duration — how many seconds it took
- Products indexed — count of unique products in the index after the run
- Status — ✔ Success or ✘ Error (with error message if applicable)
The next scheduled run time is also displayed below the table.
5.4 Categories
This section controls which top-level WooCommerce product categories appear as filter options on the search page.
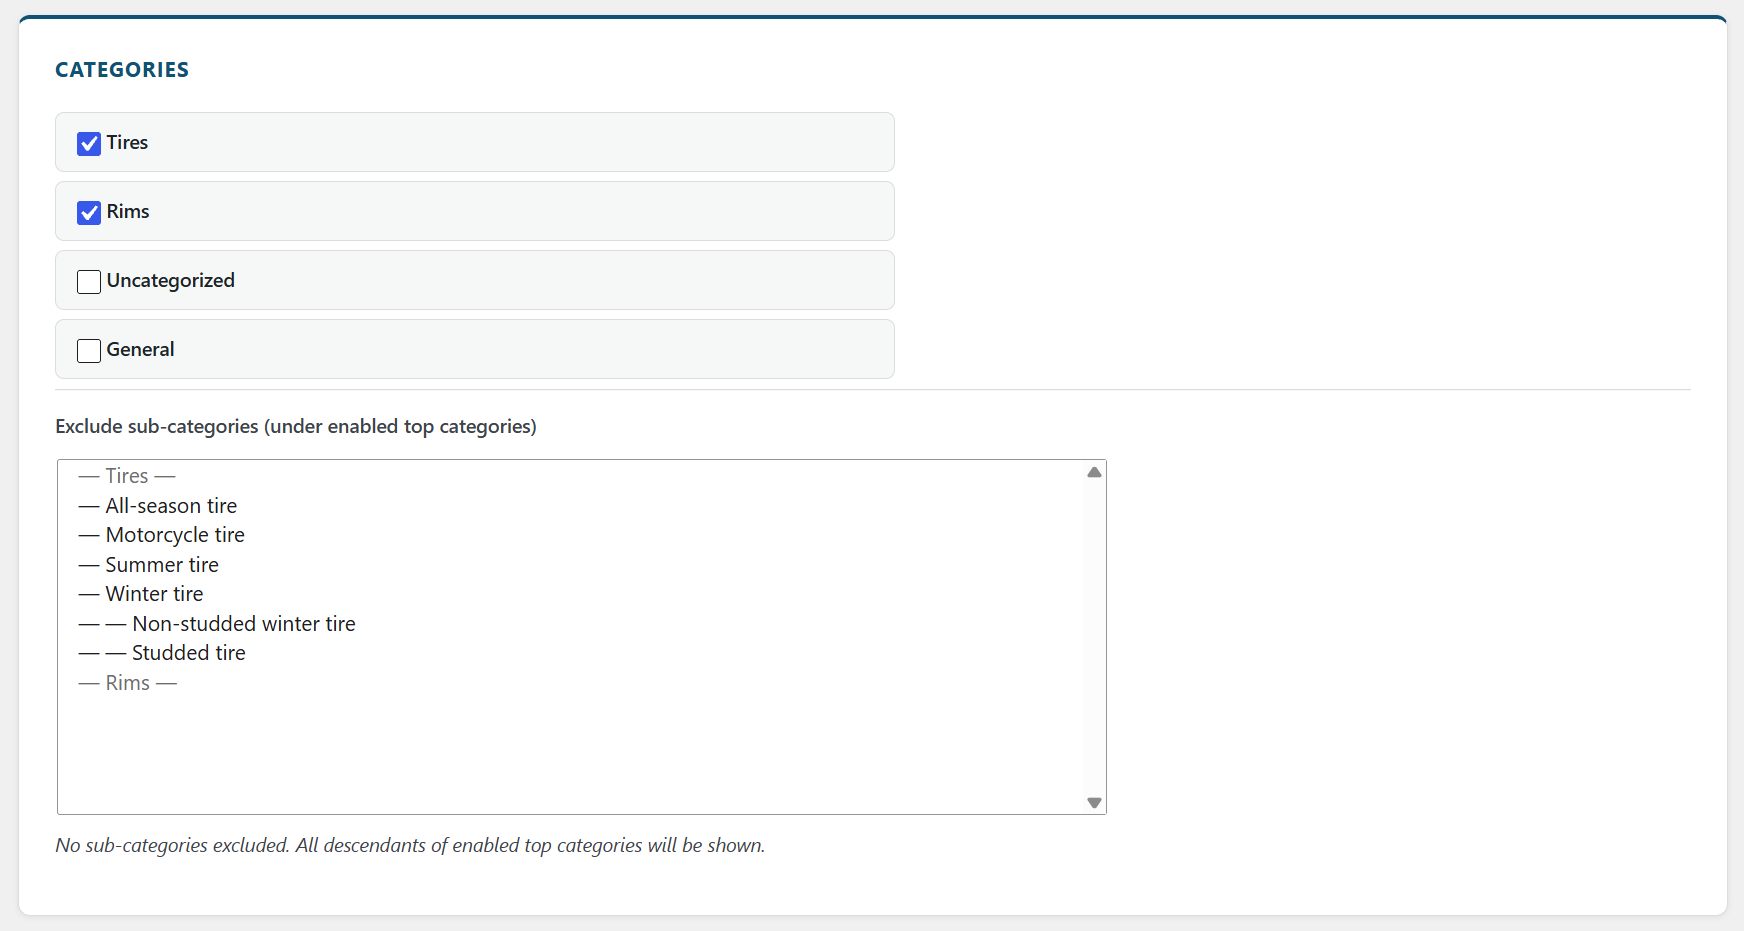
Enabling categories
Each top-level product category from your WooCommerce store is listed with a checkbox. Check the categories you want to expose as filter options.
- Only top-level categories are listed here. Sub-categories are handled by the exclusion picker below, and are shown automatically in the front-end dropdown when a parent category is selected.
- At least one category must be enabled for the search shortcode to render.
Reordering categories
Drag the listed categories into your preferred display order. The order here is the order in which categories appear in the front-end category dropdown.
The new order is saved when you click Save settings.
Exclude sub-categories
The multi-select list below the category checkboxes shows all sub-categories that belong to your enabled top-level categories.
- Hold Ctrl / Cmd and click to select multiple sub-categories to exclude.
- Selected sub-categories will not appear in the front-end sub-category dropdown, and products that belong only to excluded sub-categories will not appear when filtering by the parent.
- The current list of exclusions is summarised below the multi-select for easy review.
Leave this empty to show all sub-categories under each enabled top category.
5.5 Attributes
This section controls which WooCommerce product attributes (e.g. Colour, Size, Brand, Material) appear as filter dropdowns.
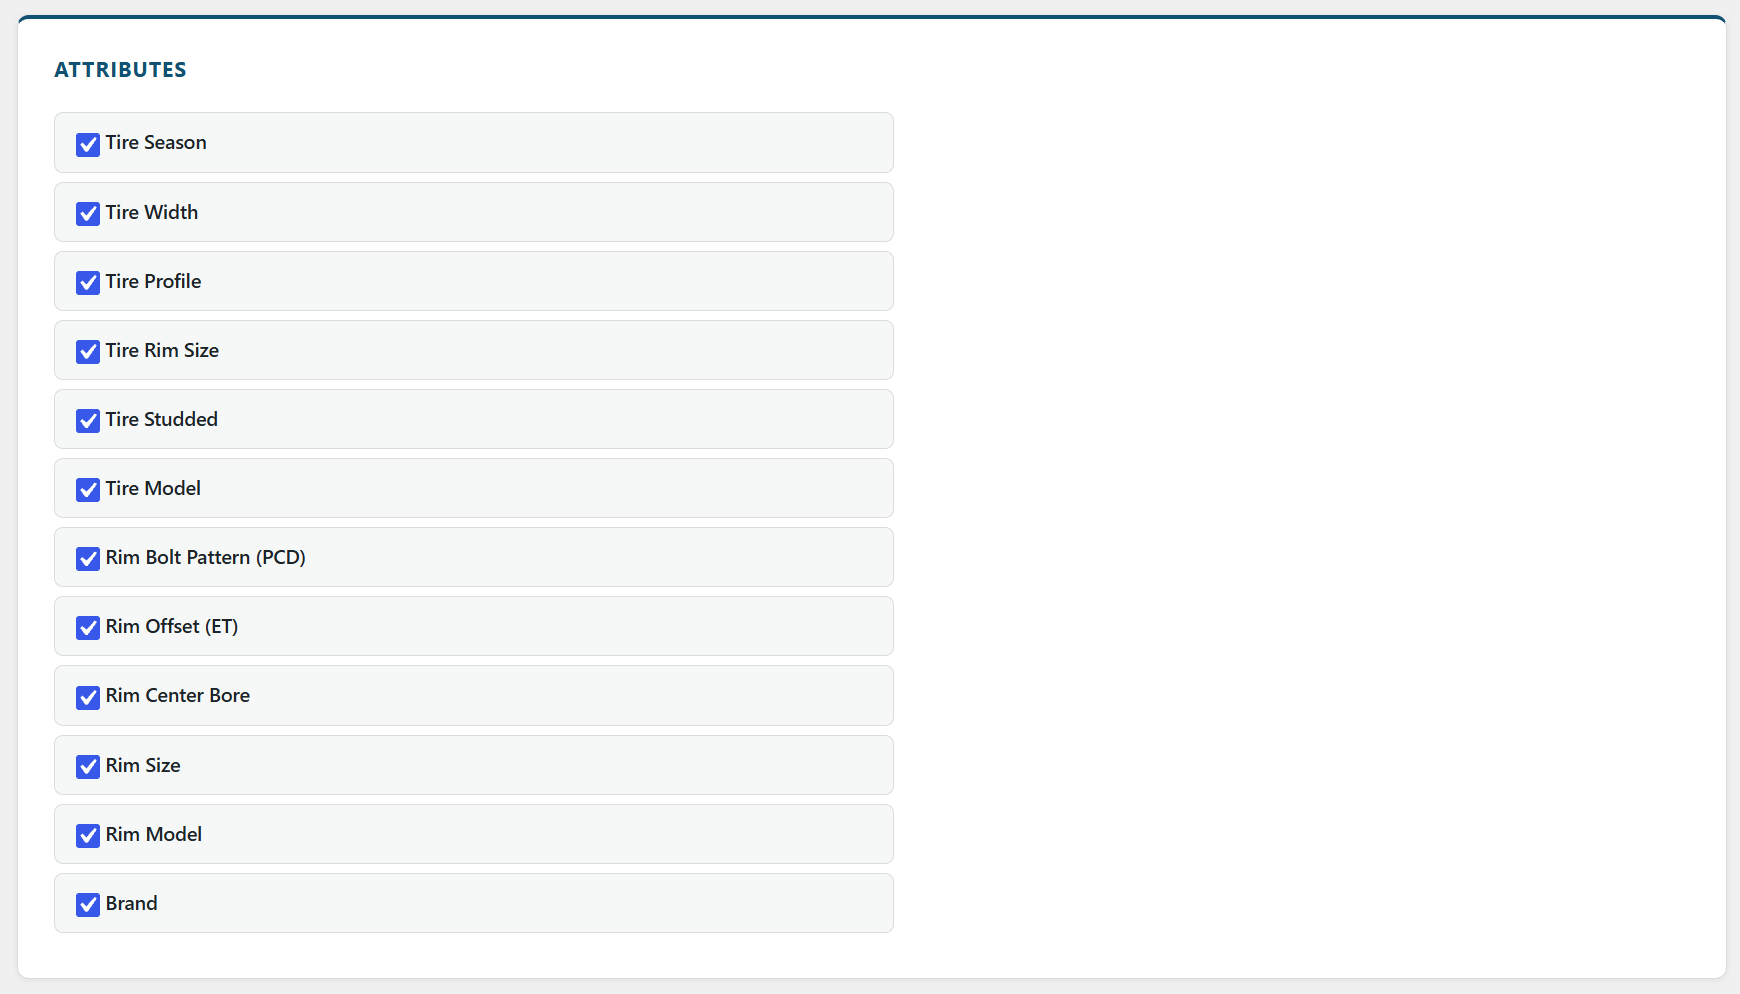
Enabling attributes
Each attribute registered in WooCommerce (Products → Attributes) is listed with a checkbox. Check the attributes you want to expose as filter options.
The Brand attribute is always included in the list automatically, even if it is not registered as a formal WooCommerce attribute, to support stores using a custom brand taxonomy.
Reordering attributes
Drag the attribute rows into your preferred order. This order determines the left-to-right (or top-to-bottom on mobile) sequence of the filter dropdowns on the front end.
Save the new order by clicking Save settings.
5.6 Tags
This section controls which WooCommerce product tags appear as filter toggles.
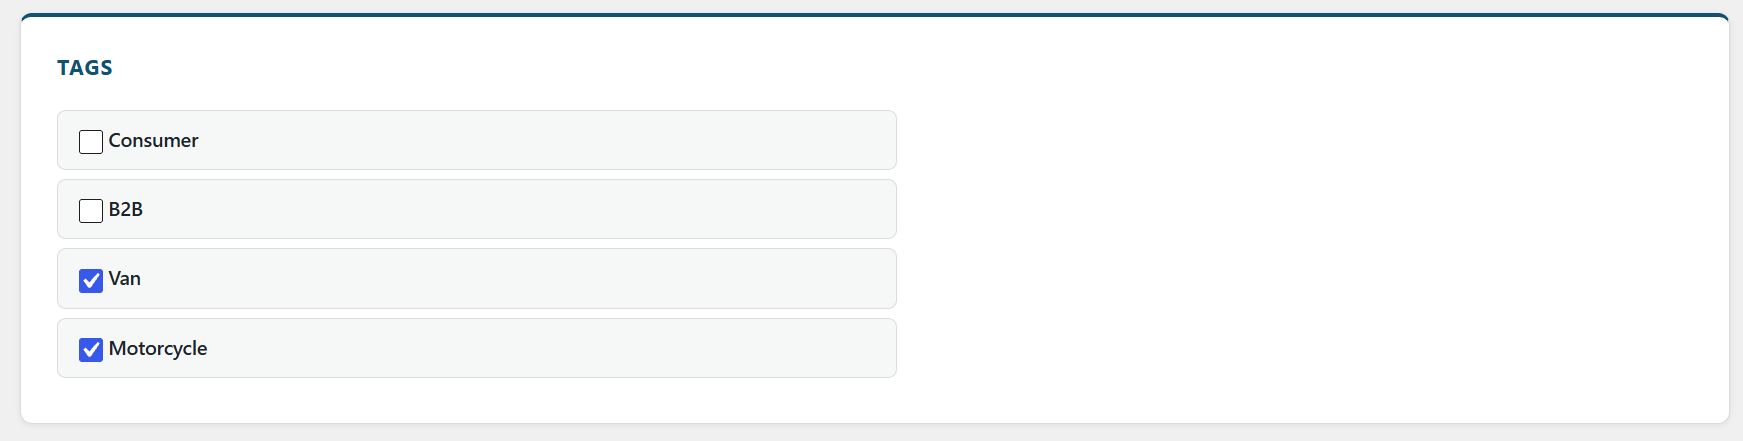
Enabling tags
Each product tag from your WooCommerce store is listed with a checkbox. Check the tags you want to expose as filter options.
Tags behave as binary toggles on the front end (show/hide products with this tag) rather than as multi-value dropdowns like attributes.
Reordering tags
Drag tag rows to set the front-end display order, then click Save settings.
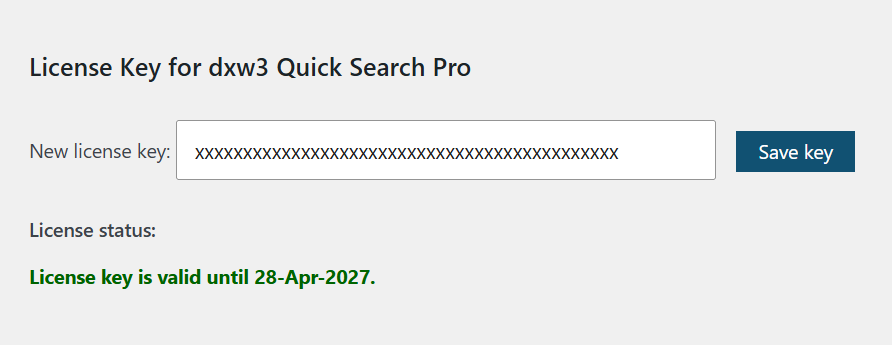
5.7 License Settings
Beneath the main settings form, the License Settings section allows you to enter your license key to activate plugin updates and unlock the Hide branding option.
Enter your key and click Activate License. The status indicator will confirm whether the key is valid.
6. Placing the Search on a Page
6.1 Full Search — [dxw3-quick-search]
Add this shortcode to any WordPress page to render the full-featured product filter and results grid.
[dxw3-quick-search]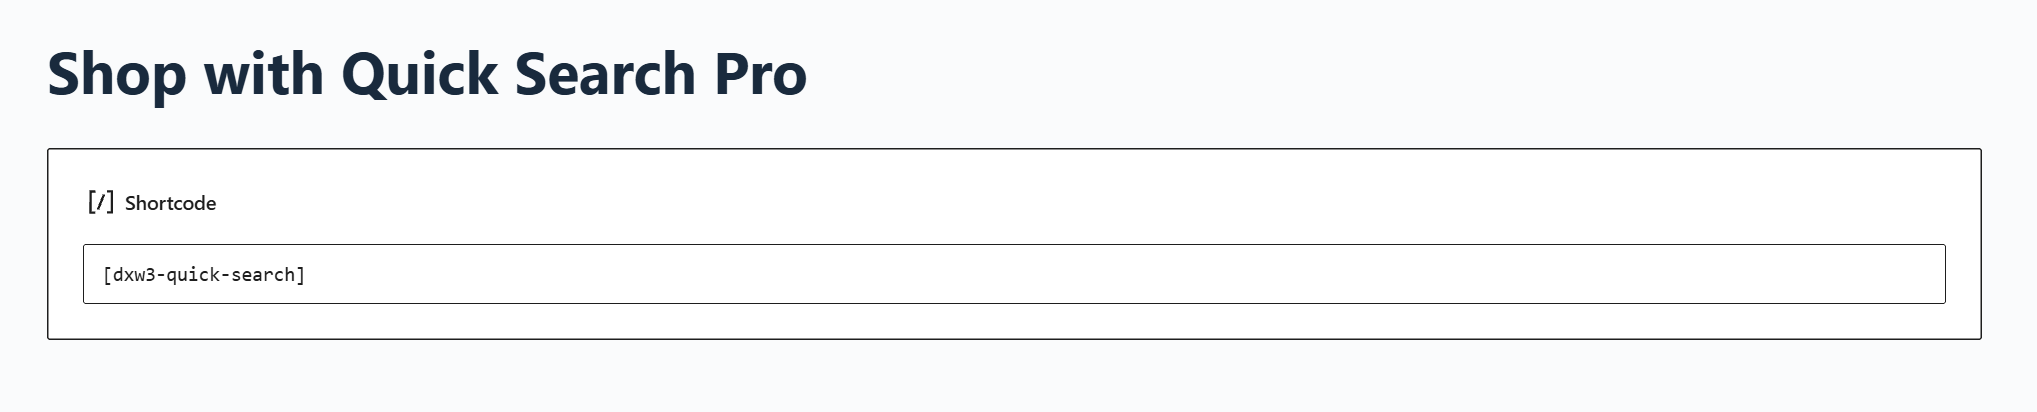
The shortcode renders nothing if no categories have been enabled in the settings. The page can use any theme template; alternatively, create a file at:
wp-content/dxw3-qs-theme/page-quick-search.phpand the plugin will use it as the page template automatically when the shortcode is present.
6.2 Mini Search Box — [dxw3-quick-search-mini]
A compact filter widget that redirects users to the full search page with pre-applied filters. Useful in hero sections, landing pages, or widget areas.
Basic usage:
[dxw3-quick-search-mini target_url="/shop-search/"]All shortcode attributes:
| Attribute | Default | Description |
|---|---|---|
target_url | / | The URL of the page containing [dxw3-quick-search]. Users are redirected here on submit. |
category | (empty) | A WooCommerce product category slug or numeric term ID to pre-scope the filters. |
fields | (empty) | Comma-separated list of attribute slugs to display (e.g. tire-width,tire-profile). The att_ prefix is optional — the plugin adds it automatically. Slugs are derived from the WooCommerce attribute label using sanitize_title(). Every slug listed here must also be enabled under Settings → Attributes. To find the correct slug, open your browser DevTools → Network tab while loading a page with the mini search box and inspect the valid_values keys in the JSON response. |
label | (empty) | Label for the toggle button when multiple groups are defined. |
submit | Search | Text for the submit button. |
Example with a specific category and fields:
[dxw3-quick-search-mini target_url="/search/" category="clothing" fields="colour,size" submit="Find products"]Multiple groups (e.g. different filter sets for different product types) require the dxw3_qsm_groups PHP filter — see the developer documentation at dx-w3.com/dxw3-quick-search-pro-hooks/.


7. When to Rebuild the Index
| Situation | Action needed |
|---|---|
| First-time setup | Manual rebuild required |
| Individual products saved via wp-admin | Automatic — no action needed |
| Bulk product import (CSV, WP-CLI, API) | Manual rebuild, or rely on scheduled rebuild |
| New product category added | Manual rebuild |
| Product attribute added or renamed | Manual rebuild |
| Product tag added | Manual rebuild |
| Category hierarchy changed | Manual rebuild |
| Sub-category exclusion settings changed | Save settings triggers the map update automatically |
8. Troubleshooting
The shortcode renders nothing
Ensure at least one category is enabled under Settings → dxw3 QS Pro → Categories and that Save settings has been clicked.
Filters appear but show no results / wrong results
Run Reset and Rebuild Search Index. The index may be out of sync with your current product data.
The rebuild button does nothing or spins forever
Check your server PHP error log for fatal errors during the rebuild. Ensure the wp-content/plugins/dxw3-quick-search-pro/endpoint/ directory is writable by the web server. On very large catalogues, increase max_execution_time in php.ini.
Lightning endpoint mode returns errors
Switch back to WordPress AJAX mode temporarily. Verify that your web server can execute PHP files directly inside the plugin’s endpoint/ directory. Some managed hosting providers block this.
Scheduled rebuild does not run
WordPress cron relies on site traffic to trigger. On low-traffic sites, use a real server cron to call wp-cron.php on schedule:
*/5 * * * * curl -s https://yoursite.com/wp-cron.php?doing_wp_cron > /dev/nullNew attributes or categories do not appear in the filter
Run Reset and Rebuild Search Index after adding new taxonomy terms, then enable the new items in the relevant settings section.
“Hide branding” option is not visible
This option is only shown when a valid license key is activated under the License Settings section.